Nails for James Hardie siding are crucial for a strong and lasting exterior. Choosing the right nails, understanding installation methods, and preventing potential issues are all vital for a successful project. This guide covers everything you need to know about selecting and using nails for your James Hardie siding, from type and size to installation techniques and maintenance.
Different nail types and sizes are suitable for various James Hardie siding applications. Proper installation ensures longevity and a beautiful finish. We’ll explore the factors to consider and provide practical advice to help you achieve optimal results.
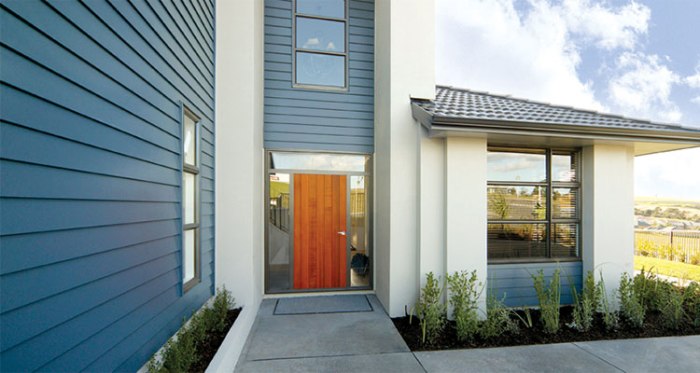
Types of Nails for James Hardie Siding

Choosing the right nails for James Hardie siding is crucial for ensuring the longevity and aesthetic appeal of your home. Improper nail selection can lead to premature siding damage, compromised structural integrity, and costly repairs. This comprehensive guide explores the various types of nails suitable for James Hardie siding, highlighting their characteristics, applications, and performance.
Choosing the right nails for James Hardie siding is crucial for a lasting finish. For a delicious meal, consider checking out the menu at menu de chez antonio restaurant. Whether you opt for galvanized or stainless steel nails, ensure they’re the correct size and type for your specific James Hardie siding. This will help prevent issues like rusting and ensure a strong, long-lasting installation.
Nail Head Styles
Different head styles offer varying levels of holding power and aesthetic appeal. Understanding these nuances is critical for achieving a professional finish. Round-head nails provide a clean look, while flat-head nails offer a more subtle profile, suitable for specific applications where aesthetics are a concern. Oval-head nails are used in areas requiring extra strength and secure fastening.
The correct head style ensures a clean finish and prevents the nail head from protruding too far, protecting the siding surface from damage.
Nail Material Compositions
The material composition of the nail directly impacts its performance in diverse weather conditions. Galvanized nails, coated with zinc, offer superior corrosion resistance, preventing rust and extending the lifespan of the siding. Stainless steel nails, known for their exceptional corrosion resistance, are best suited for high-moisture environments or extreme weather conditions. Copper nails, while visually appealing, are less commonly used due to their higher cost.
The material selection directly influences the nail’s ability to withstand weathering and prevent degradation.
Nail Lengths and Gauges
Nail length and gauge are critical considerations for achieving a strong and secure installation. Shorter nails are appropriate for thin siding applications, while longer nails are required for thicker materials or when penetrating through multiple layers. The gauge of the nail refers to its diameter. Thinner gauges are better suited for thinner siding materials, and thicker gauges are used for thicker applications.
Matching the correct length and gauge to the siding material ensures proper penetration without damaging the siding.
Nail Shank Dimensions
Nail shank dimensions, including width and thickness, are also important factors. Shank dimensions are crucial for the nail’s ability to hold and distribute the load evenly. Larger shank dimensions offer increased holding power and stability. Smaller shanks may be suitable for certain applications where minimizing protrusion is desired.
Nail Type Selection for Siding Applications
Selecting the appropriate nail type for different siding applications is paramount for optimal performance. Exterior siding applications, subject to harsh weather conditions, require nails with superior corrosion resistance, such as galvanized or stainless steel. Interior applications may not require the same level of resistance. The application dictates the necessary nail properties.
Table of Nail Types for James Hardie Siding
| Nail Type | Typical Use | Material Properties | Typical Length (in) |
|---|---|---|---|
| Galvanized Round Head | General exterior applications, including James Hardie siding | Zinc coating for corrosion resistance | 1.5 – 3.0 |
| Stainless Steel Flat Head | High-moisture areas, coastal regions | Exceptional corrosion resistance | 1.0 – 2.5 |
| Galvanized Oval Head | Areas requiring extra strength and secure fastening | Zinc coating for corrosion resistance | 2.0 – 4.0 |
Installation Methods for Nails
Properly installing nails into James Hardie siding is crucial for achieving a durable and aesthetically pleasing finish. Incorrect installation can lead to premature damage, compromising the integrity of the siding and requiring costly repairs. Careful attention to detail, the right tools, and the understanding of optimal nail placement are essential for a successful installation.Effective nail installation goes beyond simply driving the nail into the siding.
Understanding the siding’s structure, the type of nail, and the specific application method ensures longevity and prevents issues like cracking or splitting. This section provides detailed steps and considerations for nailing James Hardie siding, focusing on achieving a professional and durable result.
Nail Placement for Different Siding Designs
Optimal nail placement varies depending on the specific siding design and configuration. Understanding these variations is key to preventing damage and achieving a consistent aesthetic. For instance, in areas with intricate designs or patterns, strategically placed nails are vital to avoid compromising the design integrity. Conversely, simpler siding designs may necessitate different placement patterns for optimal performance.
Importance of Using Appropriate Tools
Selecting the right tools is paramount for a successful and efficient installation. Nail guns, when used correctly, offer speed and precision, minimizing the risk of damage. However, hand-held hammers remain a valuable tool for fine-tuning and in situations where a nail gun is impractical. The choice between a nail gun and a hammer depends on the scale of the project, the type of siding, and the desired level of precision.
Techniques for Driving Nails Straight and Accurately
Driving nails straight and accurately is essential to prevent damage and ensure a professional finish. Holding the nail at the correct angle is crucial, avoiding bending or damaging the siding. A consistent striking force is key, whether using a hammer or a nail gun, and should be tailored to the specific nail type and siding material. Practice and attention to detail are critical for achieving consistent results.
Step-by-Step Installation Guide
| Step Number | Description | Visual Representation |
|---|---|---|
| 1 | Preparation: Inspect the James Hardie siding for any damage or imperfections. Ensure the surface is clean and free of debris. Select the appropriate nails based on the siding thickness and type. | (Imagine a clean section of James Hardie siding with a ruler beside it, showcasing the area to be nailed.) |
| 2 | Marking the Location: Using a pencil, carefully mark the exact nail placement on the siding. For example, when nailing horizontal siding, the marks should be aligned for a straight and consistent appearance. | (Illustrate a pencil mark on the siding with a clear grid or layout, demonstrating proper marking placement.) |
| 3 | Driving the Nail: Position the nail gun or hammer at the marked location. Apply a consistent force to drive the nail straight into the siding, ensuring it does not bend or damage the siding. For hand-held hammers, a firm but controlled swing is essential. | (A close-up of a person using a nail gun, or a hammer, driving a nail into the siding. Show the correct angle of the nail.) |
| 4 | Finishing: Check for any imperfections or misalignment after nailing. Remove any excess nail heads and fill any gaps or imperfections as needed. | (Picture showing a completed section of nailed siding, highlighting the even appearance and absence of gaps or damage.) |
Nail Size and Length Selection
Proper nail selection is critical for secure and long-lasting James Hardie siding installations. Incorrect nail size or length can lead to premature failure, causing costly repairs and compromising the aesthetic appeal of the home. Understanding the relationship between nail size, siding thickness, and driving force is paramount for achieving optimal results.Selecting the appropriate nail size and length is directly related to the siding thickness and the required holding power.
Thicker siding requires stronger, longer nails to penetrate and secure the material effectively. This selection process ensures a robust attachment, minimizing the risk of detachment or damage over time. Calculating the optimal nail length is essential to ensure proper penetration without compromising the siding’s integrity.
Nail Size and Siding Thickness, Nails for james hardie siding
Nail size directly impacts the driving force required for installation. Smaller nails require less force, but may not adequately secure thicker siding, increasing the risk of failure. Larger nails, while offering better holding power for thicker siding, may necessitate more force, potentially damaging the siding or the installation tool. Careful consideration of both nail size and siding thickness is crucial.
Calculating Optimal Nail Length
The optimal nail length is determined by the siding’s depth and the required penetration. To calculate the optimal nail length, measure the depth of the siding’s grooves or channels. The nail should penetrate the siding sufficiently to securely engage with the substrate, typically into the wood framing. A rule of thumb is that the nail should penetrate at least 1/4 inch deeper than the siding’s depth to ensure sufficient anchoring.
Comparison of Fasteners
While nails are the most common fastener for James Hardie siding, other options exist. Screws, for example, offer a more secure, permanent fastening solution. However, the use of screws may require specialized tools and techniques and can be more expensive. The choice between nails and screws often depends on specific project requirements and considerations of cost, installation time, and desired aesthetic.
Siding Thickness, Recommended Nail Sizes, and Corresponding Lengths
| Siding Thickness (in) | Recommended Nail Size (Gauge) | Corresponding Length (in) |
|---|---|---|
| 1/2 | 16d | 1 1/2 |
| 5/8 | 16d | 1 3/4 |
| 3/4 | 18d | 2 |
| 7/8 | 18d | 2 1/4 |
| 1 | 20d | 2 1/2 |
This table provides a general guideline for nail selection. Specific recommendations may vary based on the particular siding profile and installation conditions. Always refer to the manufacturer’s specifications for the most accurate recommendations.
Nail Drive Considerations
Properly driving nails into James Hardie siding is crucial for achieving a strong, long-lasting installation. Incorrect techniques can lead to damage to the siding, compromising its integrity and aesthetic appeal. Careful consideration of the tools, angle, force, and consistent penetration is paramount for optimal results.Careful nail driving minimizes the risk of splitting or cracking the siding, ensuring a professional and aesthetically pleasing finish.
Understanding the specific requirements of different nail types and the siding material itself is essential for successful installation. This section details the proper techniques for various tools, emphasizing the importance of consistent nail penetration and the use of appropriate accessories.
Proper Nail Driving Techniques
Correcting nail driving techniques is essential to prevent damage and ensure optimal results. Using the appropriate tool and applying the right force and angle are critical factors. Different tools require different techniques to ensure efficient and effective nail driving.
- Hammer Techniques: For hand-driven nails, use a claw hammer, ensuring the hammer head strikes the nail’s center. Avoid striking the side of the nail, which can cause bending or damage. Aim for consistent, controlled strikes to avoid excessive force, which can lead to splitting. A soft, controlled swing will minimize the risk of overdriving or damaging the siding.
A firm grip on the hammer is vital to avoid slippage, which can lead to inconsistent nail placement and damage.
- Nail Gun Techniques: Nail guns require precise operation. Ensure the nail gun is properly calibrated for the specific type and size of nail. Position the nail gun at a 90-degree angle to the siding surface. Press firmly against the siding to ensure proper nail penetration. Avoid excessive pressure, which can lead to bending or damaging the siding.
Follow the manufacturer’s instructions for optimal performance and safety. Using a nail gun with a proper depth stop is vital to prevent overdriving the nails.
Importance of Angle and Force
The angle at which a nail is driven significantly impacts its penetration and hold. Driving nails at an improper angle can cause them to bend, split the siding, or result in a less-than-optimal hold. The force applied also plays a crucial role. Excessive force can lead to splitting, while insufficient force may result in incomplete penetration.
- Optimal Angle: Drive nails perpendicular to the siding surface. This ensures proper penetration and minimizes the risk of damage. A slight deviation may be necessary in specific situations, but maintain as close to a 90-degree angle as possible. Adjusting the angle slightly may be necessary for specific siding configurations or nail placement.
- Appropriate Force: Use the appropriate force based on the nail type and siding material. Too much force can damage the siding; too little force may not drive the nail to the required depth. Adjust your driving force according to the resistance encountered. Experience will help in gauging the appropriate force.
Ensuring Consistent Nail Penetration
Consistent nail penetration is vital for achieving a uniform and aesthetically pleasing finish. Inconsistent penetration can create gaps or unevenness in the siding, compromising its overall appearance. This can also impact the strength of the installation.
- Pre-drilling: For larger or thicker materials, pre-drilling a pilot hole can improve nail penetration and reduce the risk of splitting. The pilot hole should be slightly smaller than the nail shank to ensure proper alignment and minimize damage.
- Nail Sets and Countersinks: Use nail sets and countersinks to ensure the nail heads are flush with the siding surface. This creates a smooth, professional finish. Proper use of these tools is critical to achieving a clean look and preventing damage.
Process Flow Chart
+-----------------+
|   Nail Driving   |
+-----------------+
|                 |
|  1.  Inspect Nail| --> 2.  Prepare Siding
|                 |
|  3.  Select Nail | --> 4.  Choose Tool
|                 |
|  5.  Apply Force | --> 6.  Check Angle
|                 |
|  7.  Check Depth | --> 8.  Use Nail Set
|                 |
|  9.  Countersink | --> 10. Final Inspection
|                 |
+-----------------+
This flowchart provides a step-by-step guide for correctly driving nails into James Hardie siding.
Importance of Nail Sets and Countersinks
Using nail sets and countersinks is essential for creating a clean and professional finish. This ensures the nail heads are flush with the siding, preventing damage and enhancing the aesthetic appeal.
- Nail Sets: Nail sets help to drive the nail head below the surface of the siding. This is crucial for achieving a flush finish.
- Countersinks: Countersinks are used to create a recess for the nail head, further ensuring a flush and even surface.
Material Compatibility
Proper material selection is crucial for the longevity and aesthetic appeal of James Hardie siding installations. Choosing the right nails and complementary materials ensures a strong, weather-resistant bond, preventing premature deterioration and costly repairs. Compatibility issues can lead to a range of problems, including corrosion, loosening, and structural weakness.
Understanding the compatibility of various materials with James Hardie siding and different nail types is essential for a successful installation. This knowledge helps ensure the siding remains secure, attractive, and functional for many years. Different materials react differently to the environment and the stresses imposed by the installation process. Choosing compatible materials reduces the risk of these issues and promotes a long-lasting installation.
Materials Compatible with James Hardie Siding and Nail Types
Selecting the appropriate materials for use with James Hardie siding and different nail types is vital for a successful installation. This selection significantly influences the long-term performance of the siding. Choosing incompatible materials can lead to corrosion, loosening, or other structural issues.
Choosing the right nails for James Hardie siding is crucial for a lasting, beautiful finish. For a comprehensive selection of high-quality supplies, consider checking out a reputable supplier like house of pizza ware ma. They likely offer a wide range of tools and materials, including specialized fasteners, ensuring your siding project is a success. After all, proper nailing is essential for a durable James Hardie siding installation.
- Wood Framing: Pressure-treated lumber is a common choice for framing. Using galvanized nails ensures a durable bond between the wood and the James Hardie siding. Corrosion resistance is paramount, especially in humid environments, and galvanized nails offer excellent protection. Wood should be properly prepared and moisture content managed to minimize the risk of rot and fungal growth, which can compromise the integrity of the framing and affect the long-term performance of the installation.
- Metal Framing: Aluminum or steel framing can be used in specific situations. Using nails designed for metal-to-James Hardie siding connections is essential. Corrosion resistance is also crucial for metal framing, so selecting appropriate galvanized or stainless steel nails is important to avoid potential problems.
- Concrete/Masonry: If James Hardie siding is attached to concrete or masonry, specialized siding nails are required. These nails are designed to penetrate and hold securely within the masonry. Appropriate nail types should be chosen for the specific type of concrete or masonry material. The use of appropriate nails for concrete or masonry ensures proper adhesion and prevents potential issues with the installation.
Potential Incompatibility Issues
Using inappropriate materials with James Hardie siding and nails can lead to significant problems. This often results in premature failure and can necessitate costly repairs.
- Corrosion: Using non-galvanized nails with wood or metal framing in environments with high humidity can lead to rapid corrosion, weakening the bond between the materials. This can result in loose or damaged siding over time. The selection of galvanized or stainless steel nails significantly mitigates this risk.
- Moisture Penetration: Improperly sealed or unsealed joints between incompatible materials can create pathways for moisture to enter, potentially leading to rot, mold, or mildew growth. Using materials and installation methods designed to prevent moisture ingress will enhance the durability of the installation.
- Structural Weakness: Using nails that are too small or not suitable for the material being fastened can result in a weakened bond. This weakness can lead to detachment of the siding, jeopardizing the structural integrity of the building.
Material Compatibility Comparison
The following table illustrates the compatibility of different nail types with various materials used in conjunction with James Hardie siding. The table highlights the recommended nail types for optimal performance and longevity.
| Material | Recommended Nail Type | Explanation |
|---|---|---|
| Pressure-Treated Lumber | Galvanized Nails | Offers excellent corrosion resistance in humid environments. |
| Aluminum Framing | Stainless Steel Nails | Provides superior corrosion resistance and durability. |
| Concrete/Masonry | Special Siding Nails | Designed for penetrating and securely fastening to concrete and masonry. |
| Steel Framing | Galvanized or Stainless Steel Nails | Ensures durability and prevents corrosion in diverse conditions. |
Wrap-Up
In conclusion, selecting the right nails for James Hardie siding is essential for a durable and aesthetically pleasing exterior. This guide has provided a comprehensive overview of the various aspects, from choosing the appropriate nail type to installation techniques and preventing common issues. Remember to consider the siding material, nail size, and installation methods for optimal results. By following these guidelines, you can confidently tackle your siding project and enjoy a beautiful, long-lasting home.
Answers to Common Questions
What are the most common types of nails used for James Hardie siding?
Common types include galvanized nails, stainless steel nails, and coated nails. The best type depends on the specific siding and the climate.
How do I prevent nail pops in James Hardie siding?
Proper nail placement, using the right size and type of nail for the siding thickness, and using the correct tools and techniques are key to preventing nail pops. Also, avoid overdriving nails.
What are some common mistakes when installing nails in James Hardie siding?
Common mistakes include using the wrong size or type of nail, improper nail placement, and overdriving nails. Also, using the wrong tools or not maintaining the correct angle can cause problems.
What is the recommended spacing between nails for James Hardie siding?
The recommended spacing between nails depends on the siding material and design. Consult the manufacturer’s guidelines for specific recommendations.
